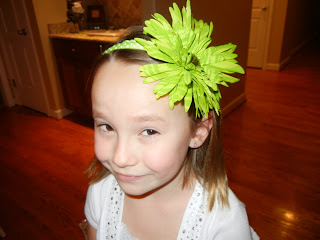
Where do I start? Ok...it all started last summer. My sister and I visited the French Hens' Farmers Market in Morris. Adorable town with adorable shops with a Farmers Market? We were there! As we wandered the quaint sidewalk booths we came upon an adorable booth with big paper pom poms and bright colored head wear in familiar patterns. This was a booth of headbands and barrettes for little girls made from ribbons and Amy Butler fabric (being scrapbookers we'd recognize Amy Butler
She did. She made them better. She found a way to make them even more darling and even better quality...and WAY CUTER!!! And she was making them faster than she could embellish them. So she called in the troops (me). I instantly became her chief headband decorator. I glued...I embellished and we created some pretty GREAT head ware. But I was JEALOUS! I want cute head-ware. Why do the little girls get all the fun? They didn't have princess dresses and play shoes and tiaras when I was little. I want a "re-do"! I want sparkles and pretties and fancies. WAIT...what about head-ware for Mommas? Something I would wear. Something cute and sassy but sophisticated. Not something that looked like I snagged it out of my daughter's dress up bin. So we started creating some GREAT Momma's head-ware that I will soon be selling on Etsy. (If you're interested leave a comment with your email and I will be sure to contact you when my Etsy shop is up and running.)
Now...fast forward to this past October when I turned 40 and got an AMAZING sewing machine from my parents. Who would want a sewing machine for the big 4-0 you wonder??? ME!!! I've always wanted to learn how to sew!! My sister's though of EVERYTHING to go with it (including a CUTE sewing box!) My new machine is amazing....

and it came with a lesson! So, I called and went to the FIRST possible lesson time. All I have to say is HEAVEN! New hobby! Anyway, on to the headbands. Months later my talented sister has abandoned our headband making...but not me! I have fine tuned our process even more and I am going to show you how to turn a dollar store headband into a cutie, boutique-worthy headband!
Step 1: Supplies. You will need:
1. inexpensive headbands (I get mine from several local dollar stores)

2. ribbon
3. matching thread
4. adorable flowers (the fancier the better!)

5. embossing gun (if you have it...helps make the headband look more "finished")
6. E6000 glue (best choice) or hot glue gun works too...
Step 2: Cut your ribbon into strips that will easily cover the headband with about 3/4-1" extra at each end. This is important because these headbands are COMFORTABLE! They don't tend to give the headband-wearer (is that a word?) a headache while wearing it...BIG PLUS!


Step 3: Sew the 2 sides of the ribbon together making a tube. When you finish trim loose threads.
Step 4: Insert headband and leave extra ribbon at each end.

Step 5: Trim the end of each ribbon so they are smooth with no stray threads or frays.
Step 6: Emboss the edges of the ribbon just slightly so that they are melted and the thread and ribbon won't fray. Good step to make your headband look more Boutique-worthy!
Step 7: Fold one edge at a time and machine sew. I run it through and then back-stitch once to ensure it will stay finished.


Step 8: Glue your flower in the desired spot. I like the flower off to the side...looks so CUTE! I apply glue to the center of the flower at first. Once it's in place I use clothes pins to hold the flower in place as it dries. I usually let it sit overnight to ensure it's dried.

There you have it...a CUTE...handmade flower headband.


If you're not up to making these or you don't sew you can order them from my Etsy shop as soon as it's opened (busy covering a maternity leave in kindergarten and shuffling the kids to their activities so free time is limited these days...maybe first thing in June?) If you're interested in purchasing my headbands please email me with your email address and information and I will contact you AS SOON as the Etsy shop is up and running! Either way, thanks for stopping by!!!!
Linking up to...


3 comments:
Hi Amy, those are the most adorable headbands! They will be the perfect thing to include in your Etsy shop. Sounds like you're busy, but having a fun time with your family and your kindergarten class! I do not believe you are 40!!!!
You did a wonderful job! These headbands are really cute! :)
Those are so cute! Here is my email: kleinheather34@gmail.com
Post a Comment